MPR View & Share in Practice

Medical imaging plays a critical role in vascular sizing and procedural planning, particularly for endovascular interventions. With an advanced MPR viewer, clinicians can obtain accurate vascular measurements from CT angiography (CTA), overcoming the limitations of standard axial views.
The ability to view and share DICOM images supports consistent device sizing, collaborative pre‑operative planning, and informed clinical decision‑making.
This guide introduces the essentials of PlanOp AI MPR viewer & share for reliable and reproducible vascular planning.
How to activate account on PlanOp AI
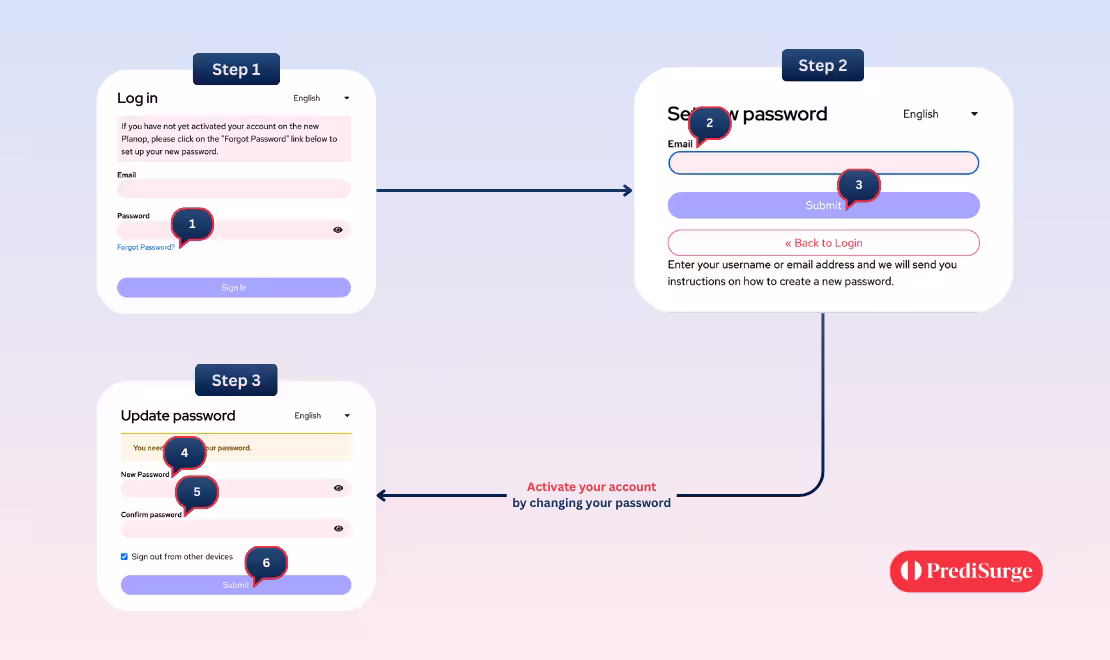
Create your account by following steps:
- Log on to PlanOp AI platform by clicking on "Log In" button on our corporate website.
- Click “Forgot password” to setup your password.
- Enter your email in the login form.
- Click on “Submit”, You will receive an email with a link to setup your new password.
- Open the link and enter your new password.
- Re-enter the same new password to validate it.
- Click on “Submit”.
- Finally, Log on again to PlanOp AI platform by clicking below.
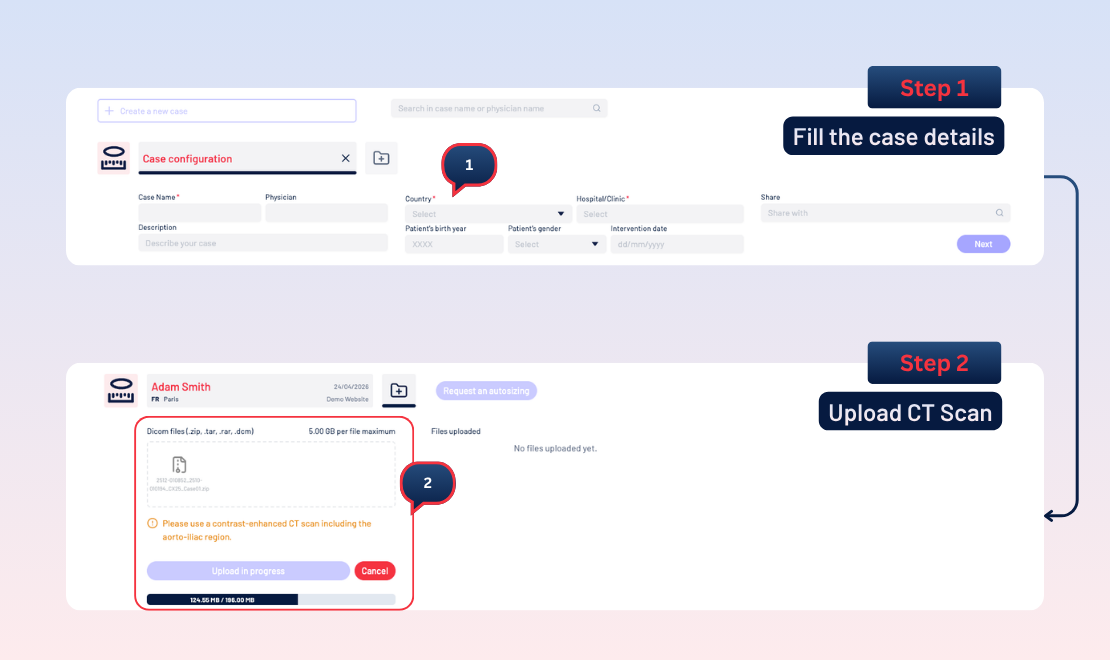
Step 1 – Create a New Case
Creating a new case by selecting "Create a new case", which opens the Case configuration panel. You can enter the essential case information such as the case name, physician, institution, patient details, and intervention date. Once the required fields are completed, you proceed by selecting "Next".
Step 2 – Upload the CT Scan
The next step is to upload the patient’s CT scan in DICOM format. PlanOp AI accepts compressed or individual DICOM files up to 5 GB per file. The scan must be contrast‑enhanced and include the aorto‑iliac region.
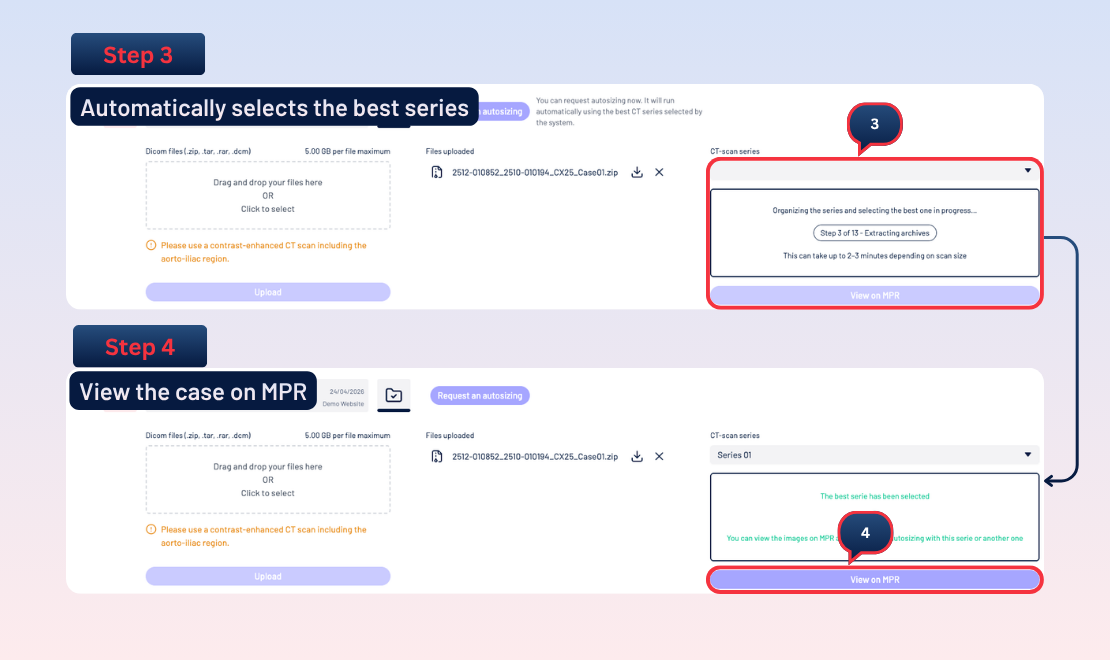
Step 3 – Automatic Series Selection
After uploading, PlanOp AI automatically organises the CT scan and selects the most suitable series for analysis. This process runs in the background and may take a few minutes depending on the size of the scan.
Step 4 – View the Case on MPR Viewer
Once processing is complete, you can open the case in the MPR viewer by selecting View on MPR. This allows you to review the scan in multiple planes and check image quality before continuing.
Features of MPR View & Share
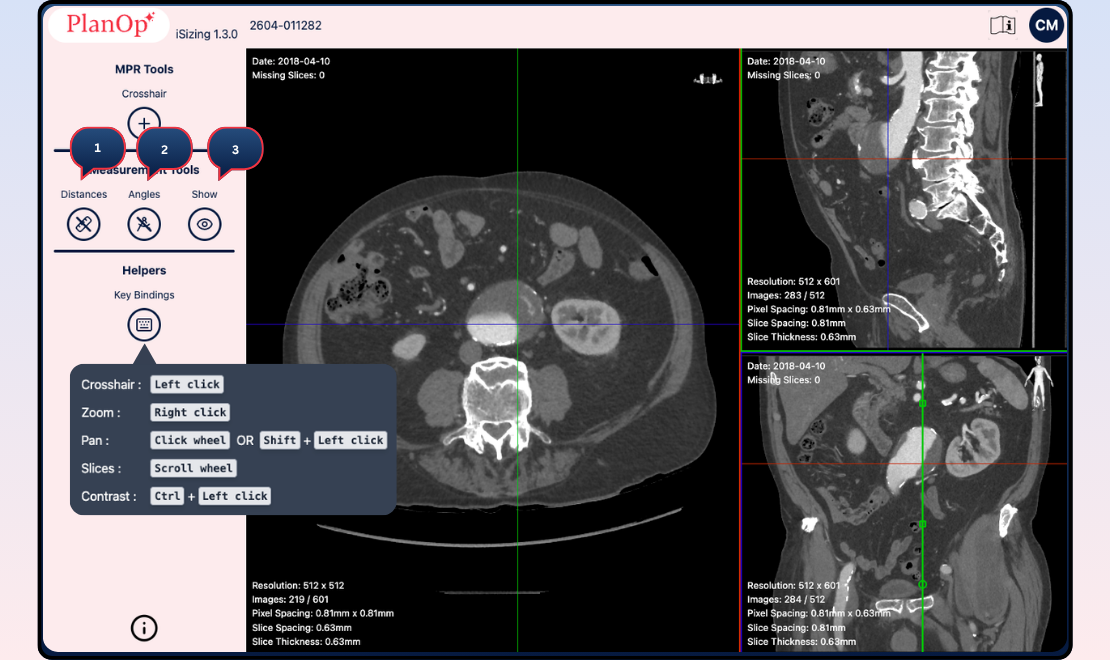
- Review the CT scan using multi‑planar reconstruction (MPR):
- Axial view
- Sagittal view
- Coronal view
- Use the available tools to:
- Move the crosshair
- Zoom and pan
- Scroll through slices
- Adjust contrast
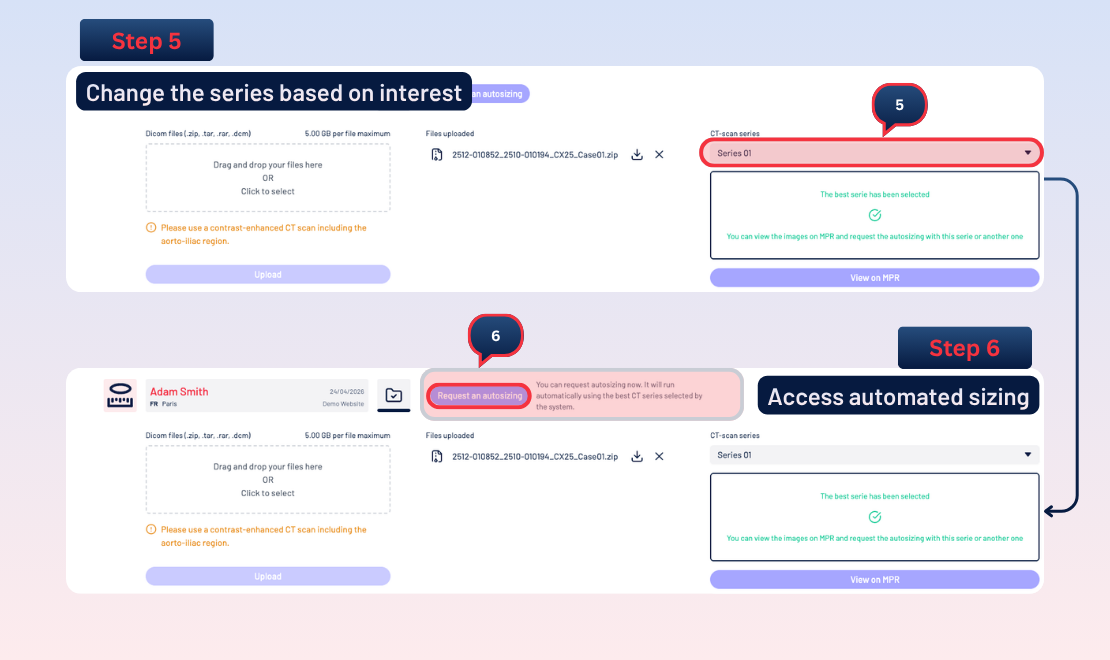
Step 5 – Change the CT Scan Series (Optional)
you can select a different CT series from the available options. This step allows you to choose the series that best fits your clinical needs before opting for automated sizing.
You may:
- View the newly selected series on MPR
- Use it for automated sizing
Step 6 – Access Automated Sizing & Planning Agent
With the preferred series selected, automated sizing can be launched by selecting "Request autosizing". PlanOp AI automatically provides sizing measurements along with automated segmentation including flow lumen, Thrombus, Calcifications.
Step 7 – Share the Case with Colleagues
Once the case is complete, you can share it with colleagues via the Case configuration panel. Shared users can access the images, MPR views, and sizing results for collaboration and review.